2.3 GitLab Continuous Integration for IOC Development
This section details the Continuous Integration (CI) process implemented within the ALS-U GitLab environment, designed to standardize the building and testing of EPICS IOCs. You will learn how IOC projects include configuration from a central CI project (alsu/ci), understand the standard pipeline stages (like build and test), and crucially, discover how to conditionally incorporate necessary ALS-U site-specific modules into your CI builds using a simple .sitemodules trigger file. A hands-on walkthrough demonstrates pushing your IOC code to GitLab and observing the CI pipeline behavior both before and after enabling site module support.
Lesson Overview
In this documentation, you will learn how to do the following:
- Understand how ALS-U GitLab CI configuration is applied to your IOC project.
- Conditionally add site-specific modules to CI builds using the
.sitemodulesfile. - Create a GitLab repository for an IOC and observe the CI pipeline execution.
Key Features
- Centralized CI Configuration: Includes and extends the CI from
alsu/cifor consistent ALS-U IOC development. - Modular Design: Allows customization based on specific IOC needs.
- Multi-OS Support: Specific configurations for Debian 12, Rocky Linux 8, and Rocky Linux 9 for EPICS.
- Defined Stages: CI process includes
buildandteststages.
Quick Start: Integrating CI into Your IOC Project
The ALS-U IOC template generator (tools/generate_ioc_structure.bash) automatically creates a .gitlab-ci.yml file in your IOC’s root directory. This file enables CI integration by referencing configurations from the central alsu/ci project. You typically do not need to create or manually edit the file, however understanding its components is helpful.
include:
  # Reference files from the 'alsu/ci' project, using the 'master' branch
  # A specific tag/commit could be used instead of 'master' for long-term stability
  - project: alsu/ci
    ref: master
    file:
      # Core workflow rules and variables
      - 'workflow.yml'
      - 'alsu-vars.yml'
      # Defines jobs related to site module handling
      - 'env-sitemodules.yml'
      # Defines EPICS build/test jobs for different OS targets
      - 'debian12-epics.yml'
      - 'rocky8-epics.yml'
      - 'rocky9-epics.yml'
      # --- Optional references (uncomment if needed) ---
      # - 'debian12-analyzers.yml'
      # - 'rocky8-analyzers.yml'
      # - 'rocky9-analyzers.yml'

stages:
  - build
  - test
  # - analyzers # Uncomment if analyzer stage jobs are referenced above
  # - deploy  # Uncomment if deploy stage jobs are referenced (if implemented in alsu/ci)
Understanding the Included Files
The include: section references several YAML files from the central alsu/ci project. Here’s a brief overview of their purpose:
workflow.yml: Defines the simple rules for all CI workflow.alsu-vars.yml: Contains common variables (like default EPICS versions, paths), configurations, and default settings used across various ALS-U CI jobs.env-sitemodules.yml: Handles environment setup and site module inclusion via.sitemodules.debian12-epics.yml,rocky8-epics.yml,rocky9-epics.yml: Define build/test for EPICS IOCs on respective OS.debian12-analyzers.yml,rocky8-analyzers.yml,rocky9-analyzers.yml: (Commented out by default) Provide template jobs for running static code analysis; users must implement the actual tool invocation commands within their project’s.gitlab-ci.ymlif they uncomment these references.
Conditional Inclusion of Site Modules using .sitemodules
The standard GitLab runners (Docker images with an OS and the default ALS-U EPICS environment) do not contain pre-built ALS-U site-specific EPICS modules, such as:
- Vacuum
dev-mks-mv2 - Vacuum
dev-mks937b-unidrv - Vacuum
dev-gamma-pctrl - Instrumentation
dev-evg-support - Instrumentation
dev-bpm-support - RF
dev-feed-support
If your IOC requires one or more of these site-specific modules, you need to signal this to the CI pipeline. This is done by creating a file named .sitemodules in the top-level directory of your IOC repository.
The CI pipeline (specifically jobs defined in env-sitemodules.yml) detects the presence of this file. If .sitemodules exists, the CI will automatically add a predefined set of common site modules to the build environment (by cloning them) before compiling your IOC. Based on the example walkthrough below, simply creating a .sitemodules file seems sufficient to trigger this. (Verify this mechanism if your requirements differ or if specific modules need to be listed within the file in some cases).
CI Stages Explaned
The stages section in your .gitlab-ci.yml defines the different phases of your CI pipeline. The current configuration includes:
build: Compiles your IOC application code against the target EPICS environment (potentially augmented with site modules if.sitemodulesis present).test: Intended for running automated tests. Currently, the default jobs referenced might only execute basic checks or serve as placeholders for user-defined tests. The following stages are often available via the central CI project but commented out by default in the template:analyzers: Reserved for jobs that perform static code analysis. Users need to configure the specific tools and commands if they reference the corresponding analyzer files.deploy: Could contain jobs for deploying build artifacts, documentation, or tagging releases.
Let’s do this! (Hands-On Example)
This walkthrough shows how to push the mouse IOC (created in a previous lesson) to a new GitLab repository and observe the CI pipeline.
Create Your First Repository on GitLab
- Go to the ALS-U GitLab instance and navigate to a suitable group, like your personal sandbox area or a project group (e.g.,
alsu/sandbox). ClickNew project.
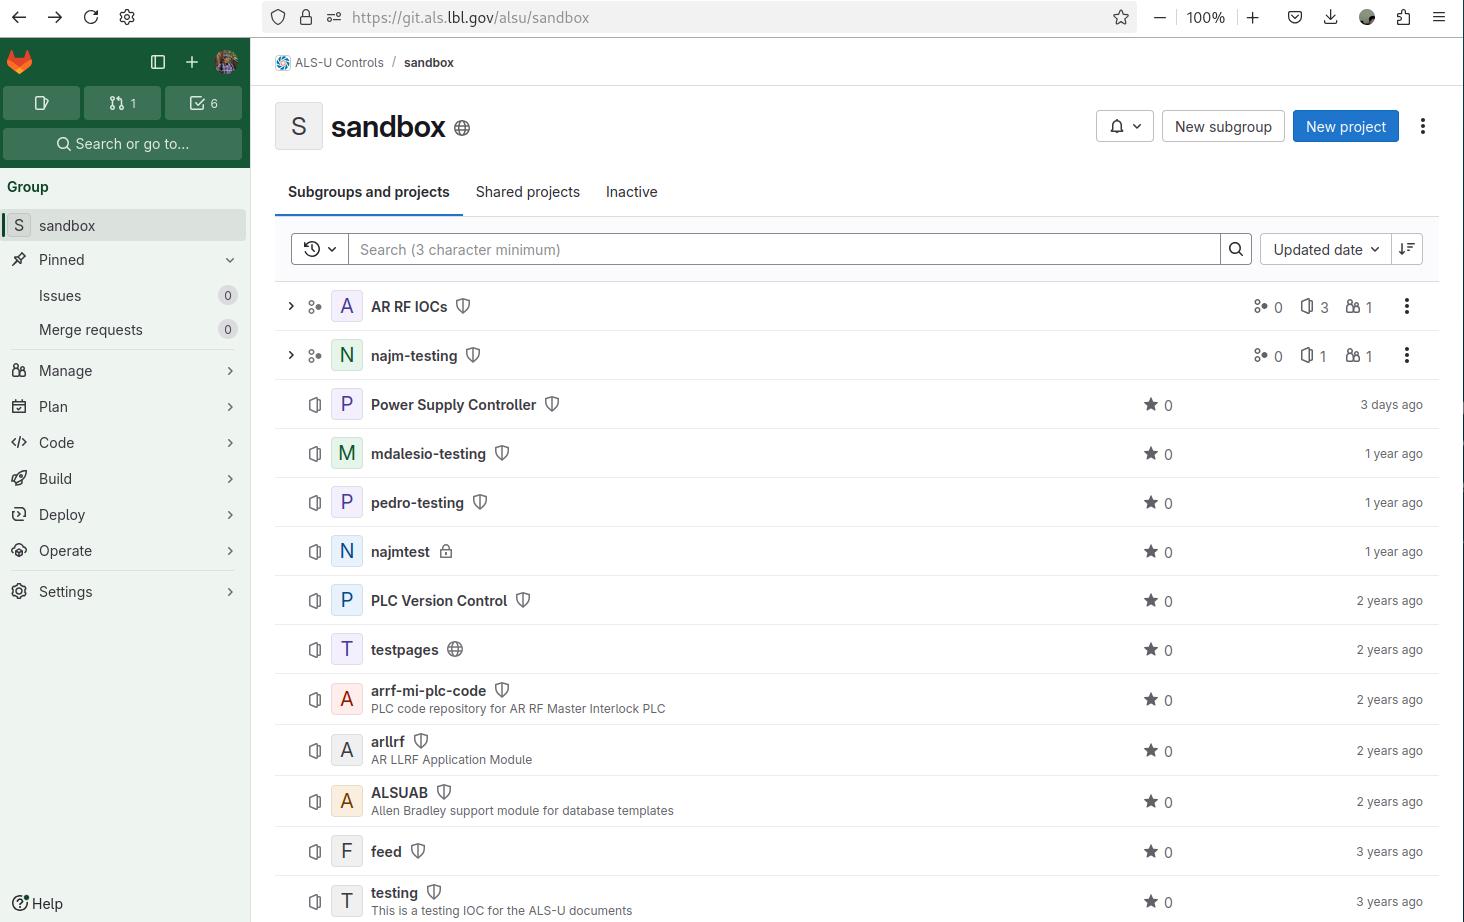 |
|---|
| Figure 1 ALS-U GitLab Sandbox |
- Select
Create blank project
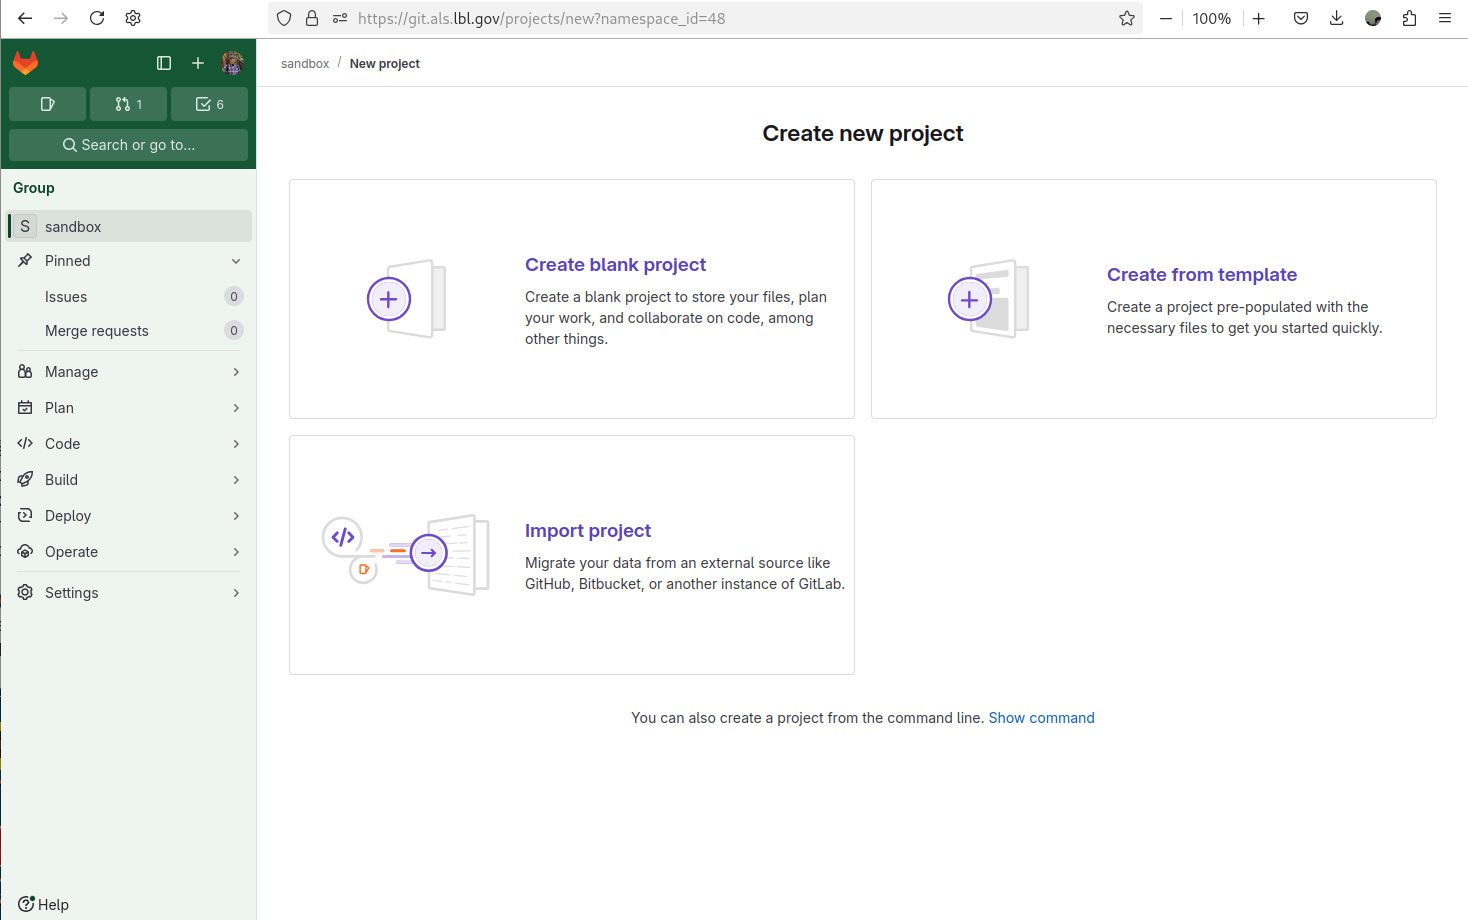 |
|---|
| Figure 2 ALS-U GitLab Sandbox - Create new project |
-
Define your own name and Hit the
Create projectProject name: your user accout +mouse, for exmaple,jeonglee-mouseVisibility Level: SelectInternalProject Configuration: UncheckInitialize repository with a README
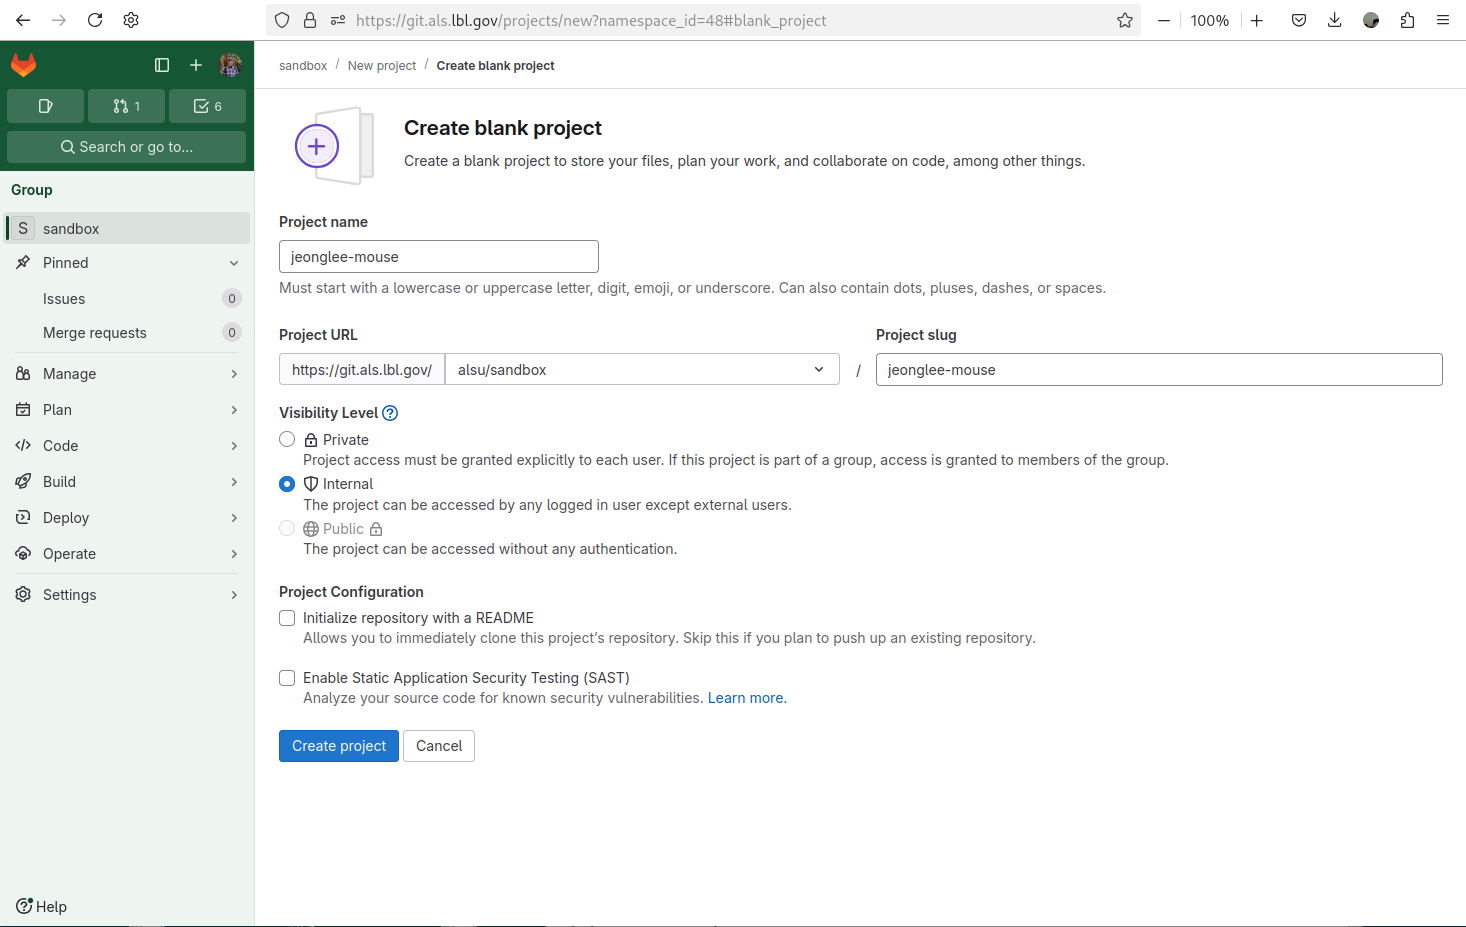 |
|---|
| Figure 3 ALS-U GitLab Sandbox - Create blank project with default selections |
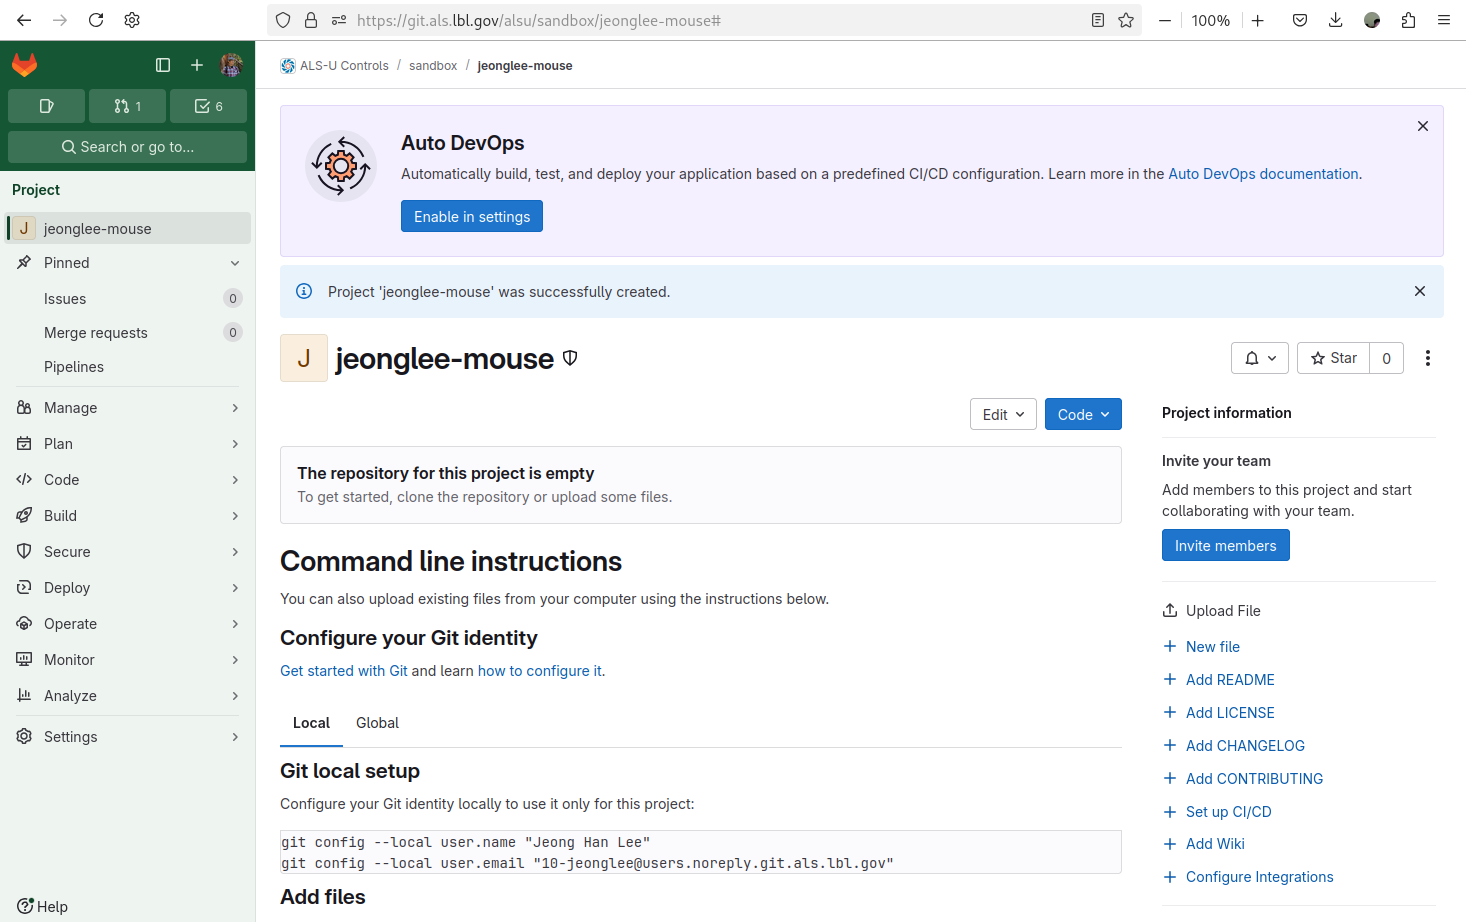 |
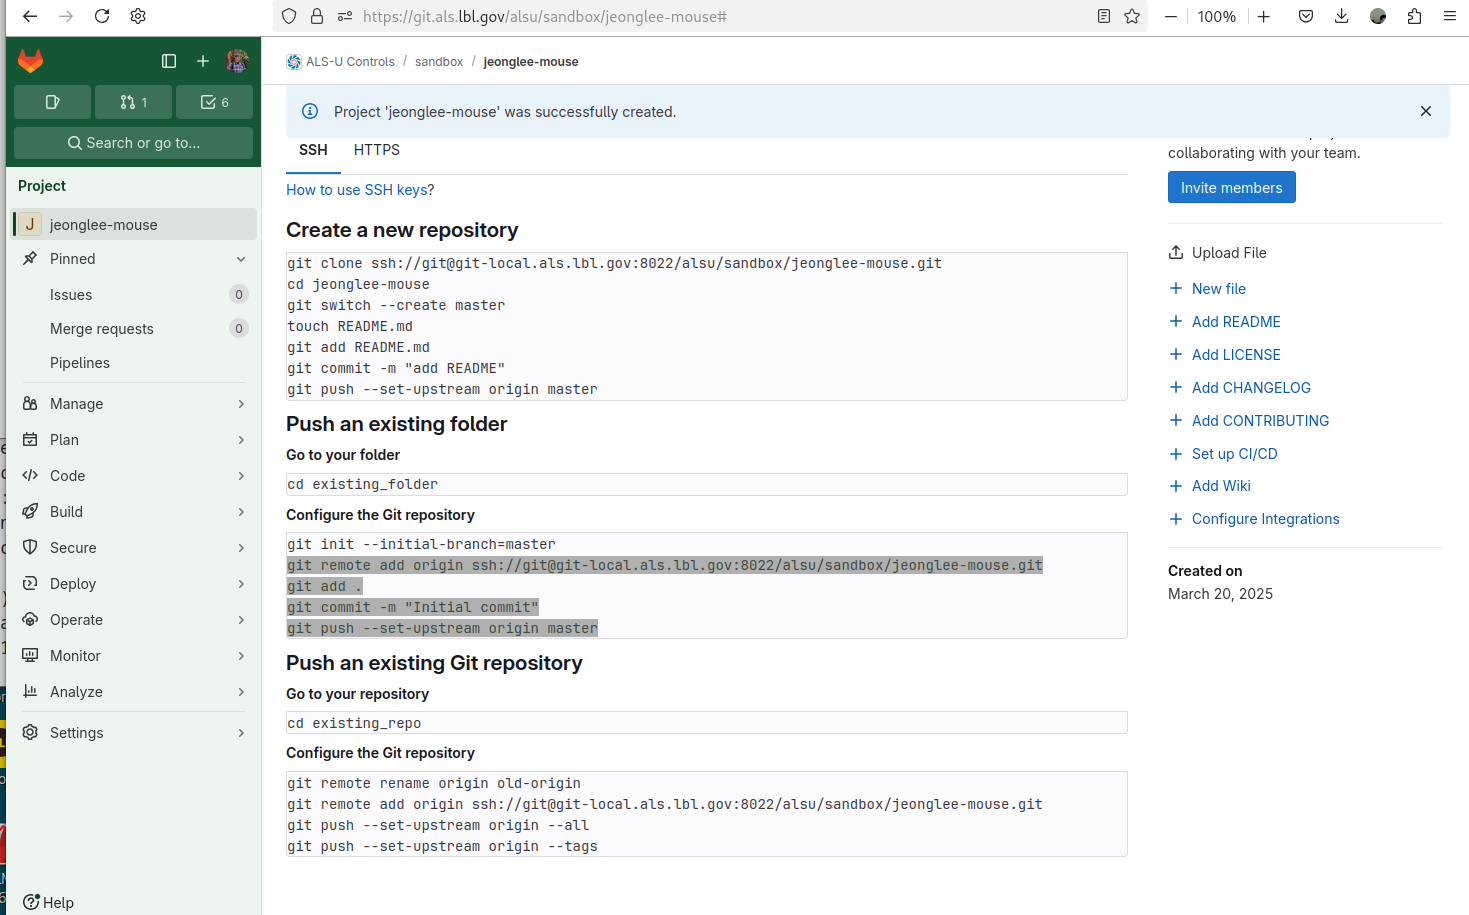
|---|
Figure 4 ALS-U GitLab Sandbox - Your gitlab repo jeonglee-mouse |
Push mouse to your repository
Now you are ready to push your code into the git repository you just create, for example, jeonglee-mouse.
Please go your created IOC folder, mouse and do the following commands
 |
|---|
Figure 5 ALS-U GitLab Sandbox - Pushing the existing folder to your gitlab repo jeonglee-mouse |
mouse $ git remote add origin ssh://git@git-local.als.lbl.gov:8022/alsu/sandbox/jeonglee-mouse.git
mouse $ git add .
mouse $ git commit -m "Initial commit"
mouse $ git push --set-upstream origin master
Check the CI Process
- Go to the gitlab web site, and Select
Pipelines
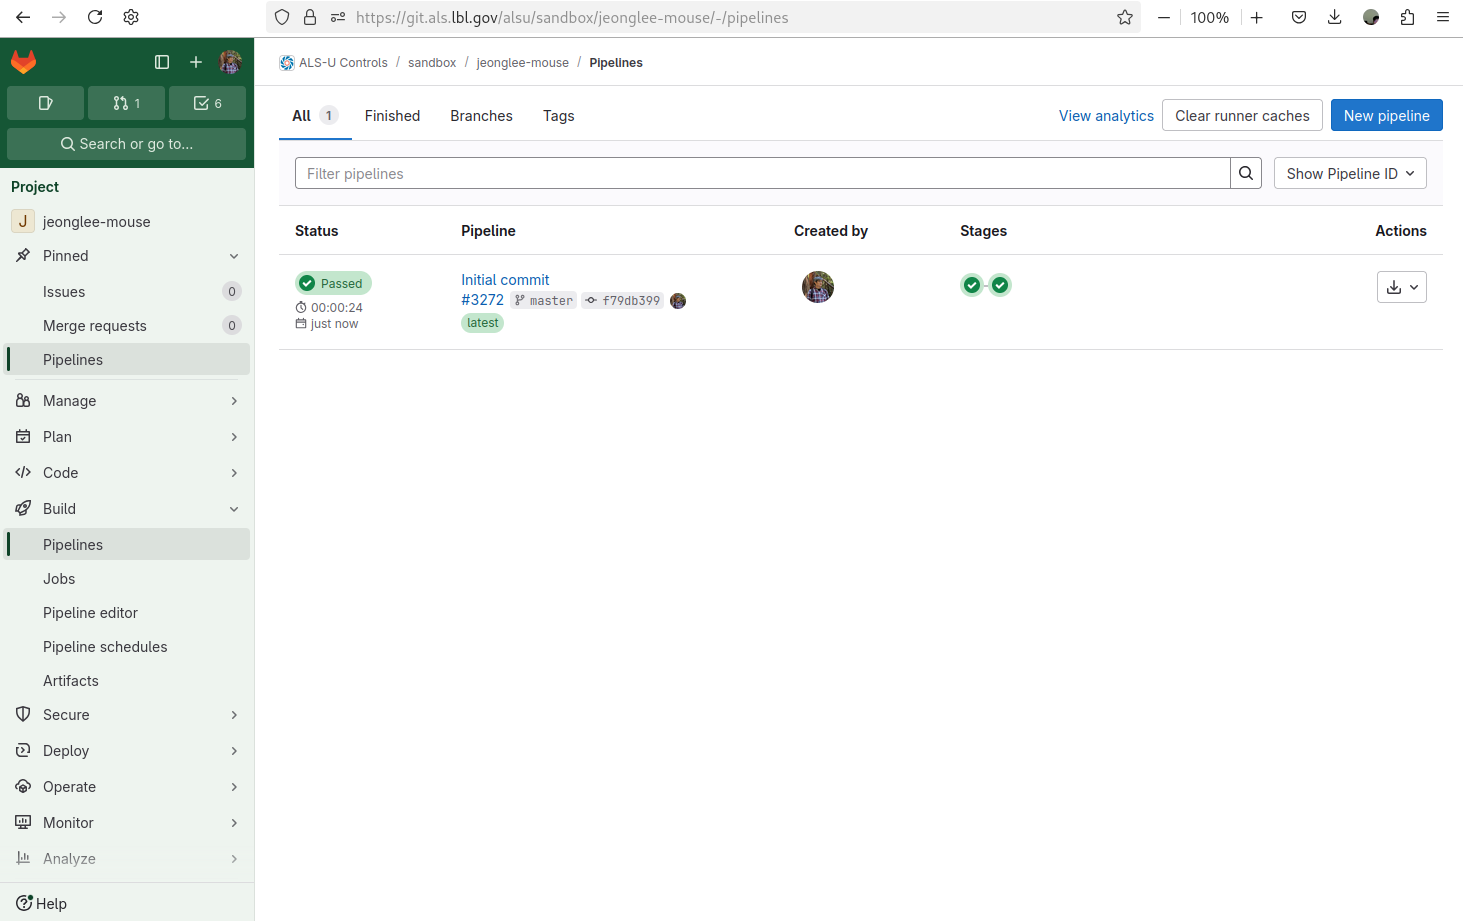 |
|---|
| Figure 6 ALS-U GitLab Sandbox - CI Pipelines |
- Select
Jobs
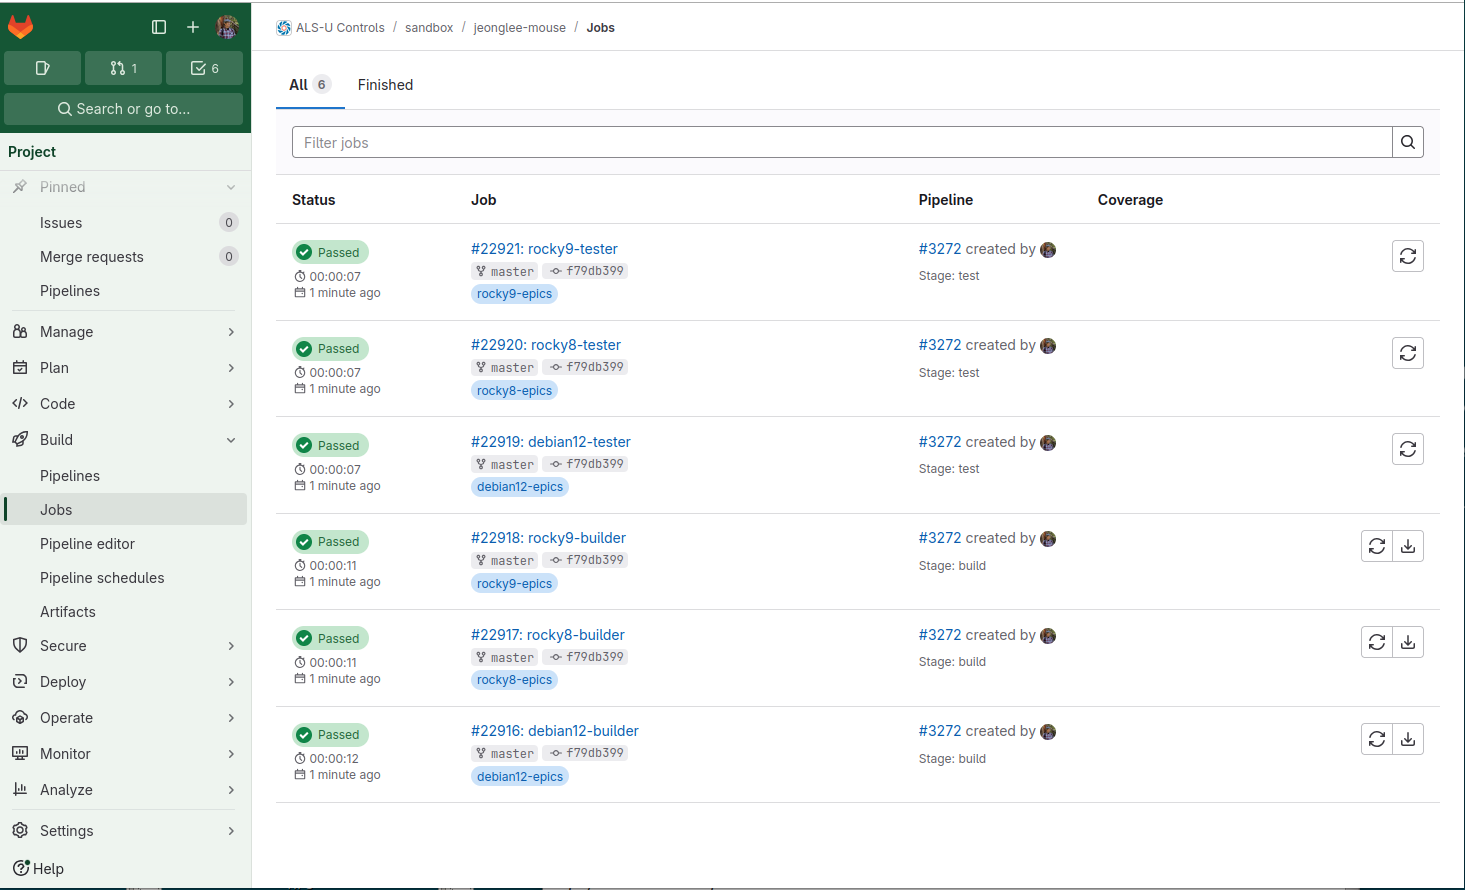 |
|---|
| Figure 7 ALS-U GitLab Sandbox - CI Jobs |
- Select
debian12-builderwithinJobs
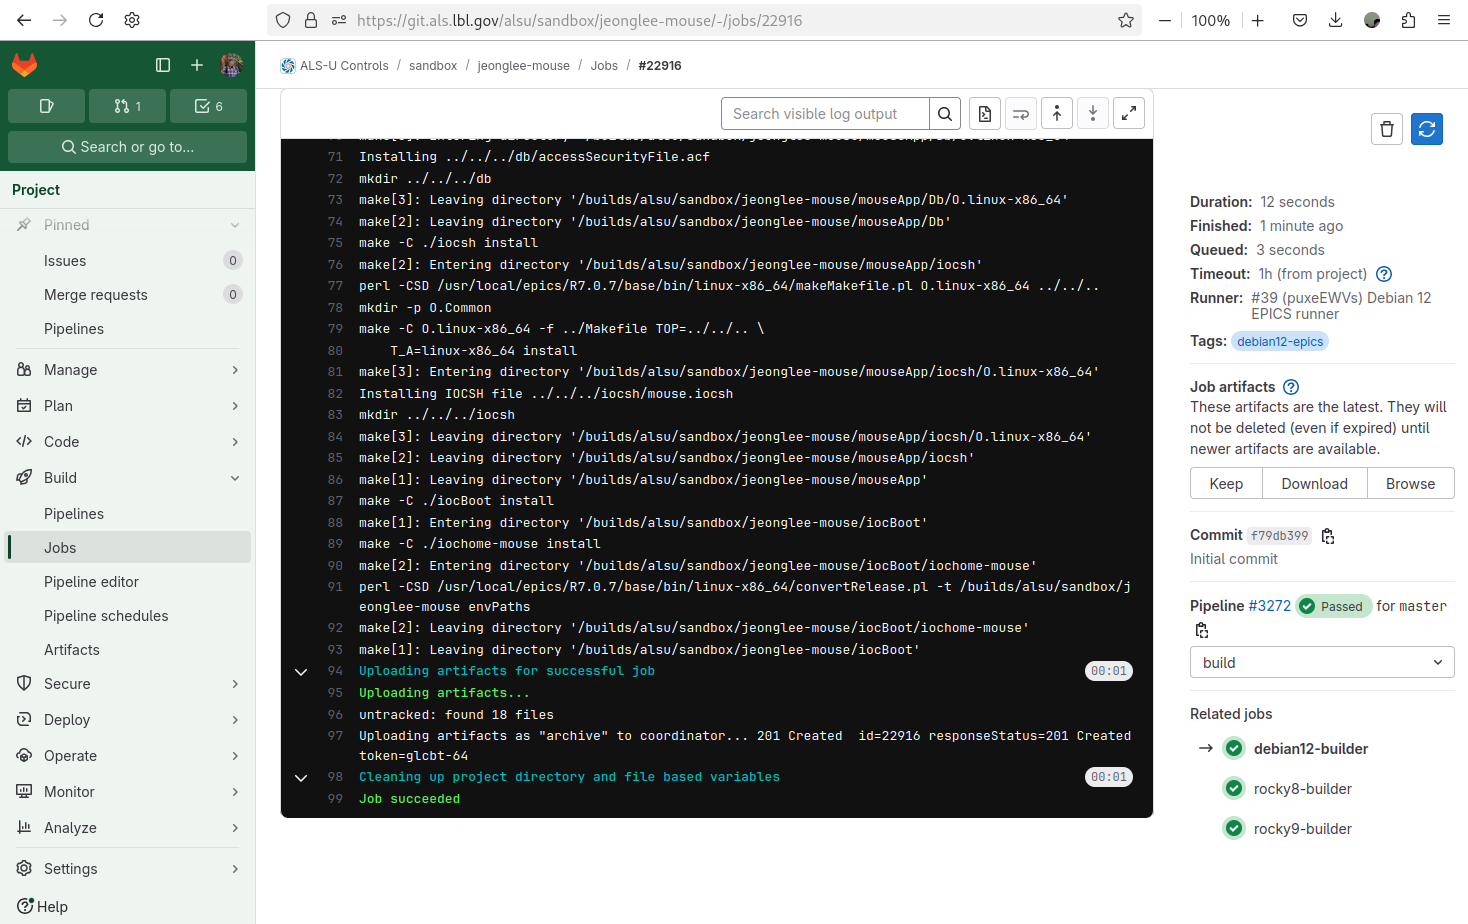 |
|---|
| Figure 8 ALS-U GitLab Sandbox - debian12-builder |
Congratulations! Your IOC building is done sucessfully! Now before moving forward the next step, please scroll up debian12-builder screen to see the process of the beginning. Note that Enjoy Everlasting EPICS! line is the starting point.
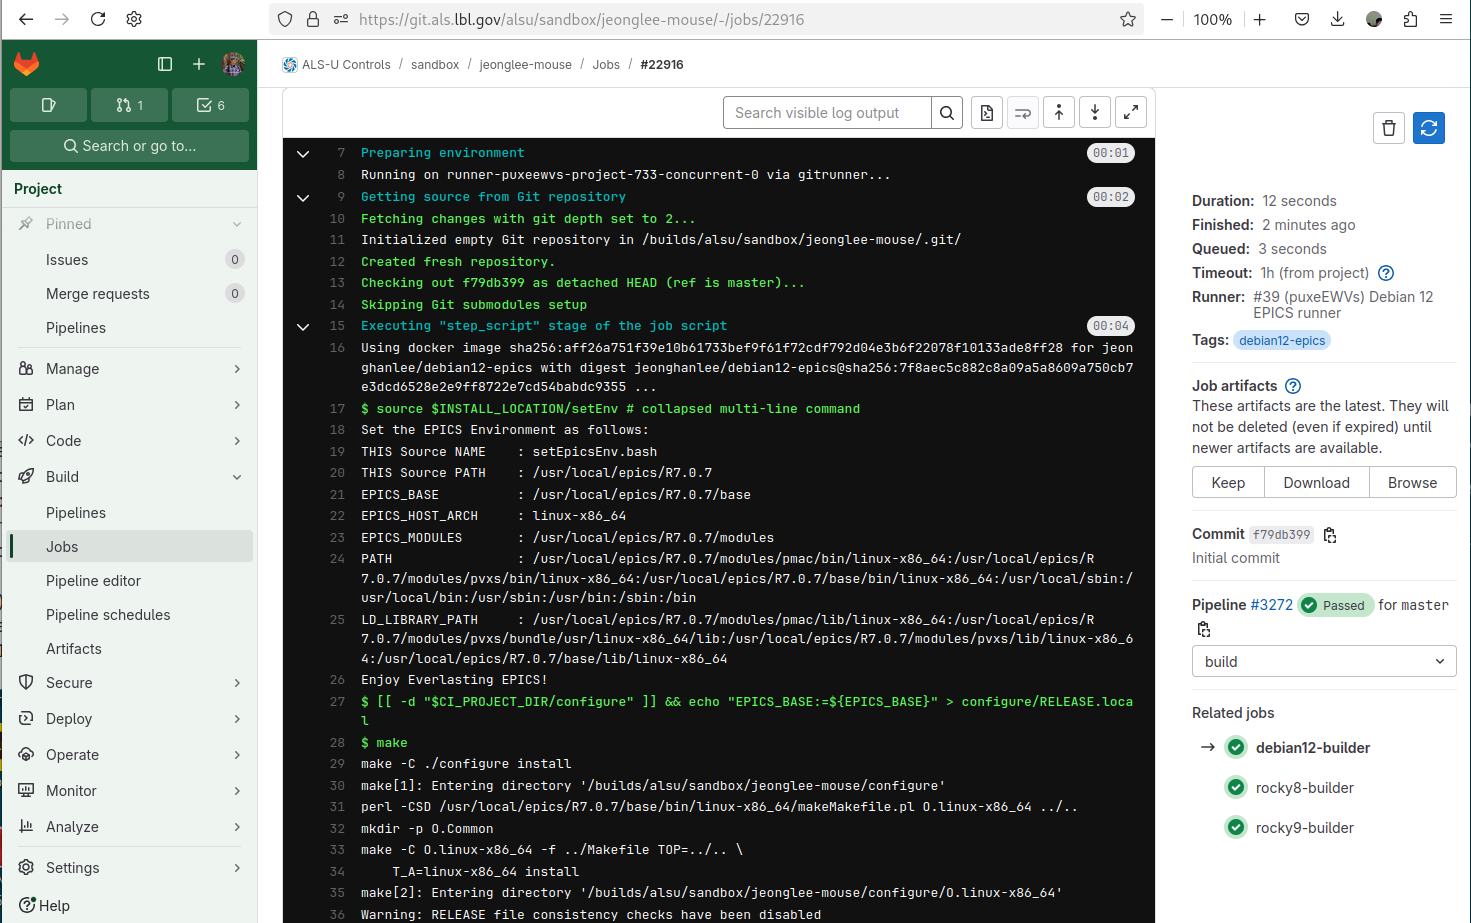 |
|---|
Figure 9 ALS-U GitLab Sandbox - debian12-builder - no .sitemodule |
Add .sitemodules dependency
If your IOC requires the site specific modules, you must add .sitemodules file into the top of your IOC.
Please go your IOC, and add .sitemodules file.
mouse (master)$ echo ".sitemodules" > .sitemodules
mouse (master)$ git add .sitemodules
mouse (master)$ git commit -m "add .sitemodules"
mouse (master)$ git push
Check the CI Process
Please check line 38 where you can find Enjoy Everlasting EPICS!. After this line, you can see the new log for Cloning into 'site-modules'....
If you see that message, it indicates that you have configured the .sitemodules file correctly. Your entire CI process requires more time to compile these modules.
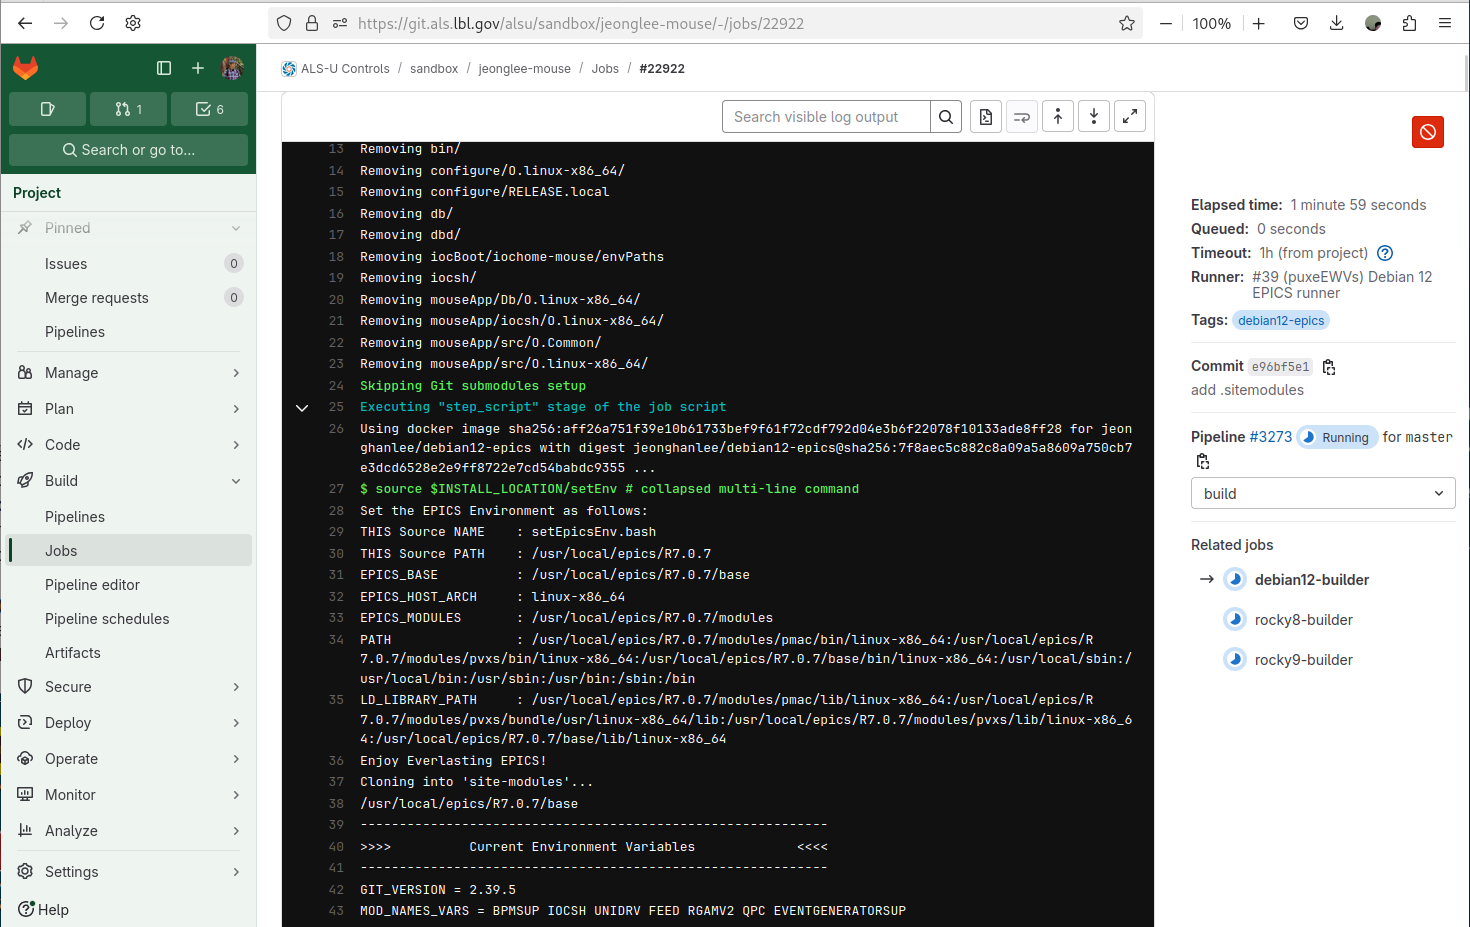 |
|---|
Figure 10 ALS-U GitLab Sandbox - debian12-builder - .sitemodule |
Please scroll down more, you can see detailed information about your sitemodules.
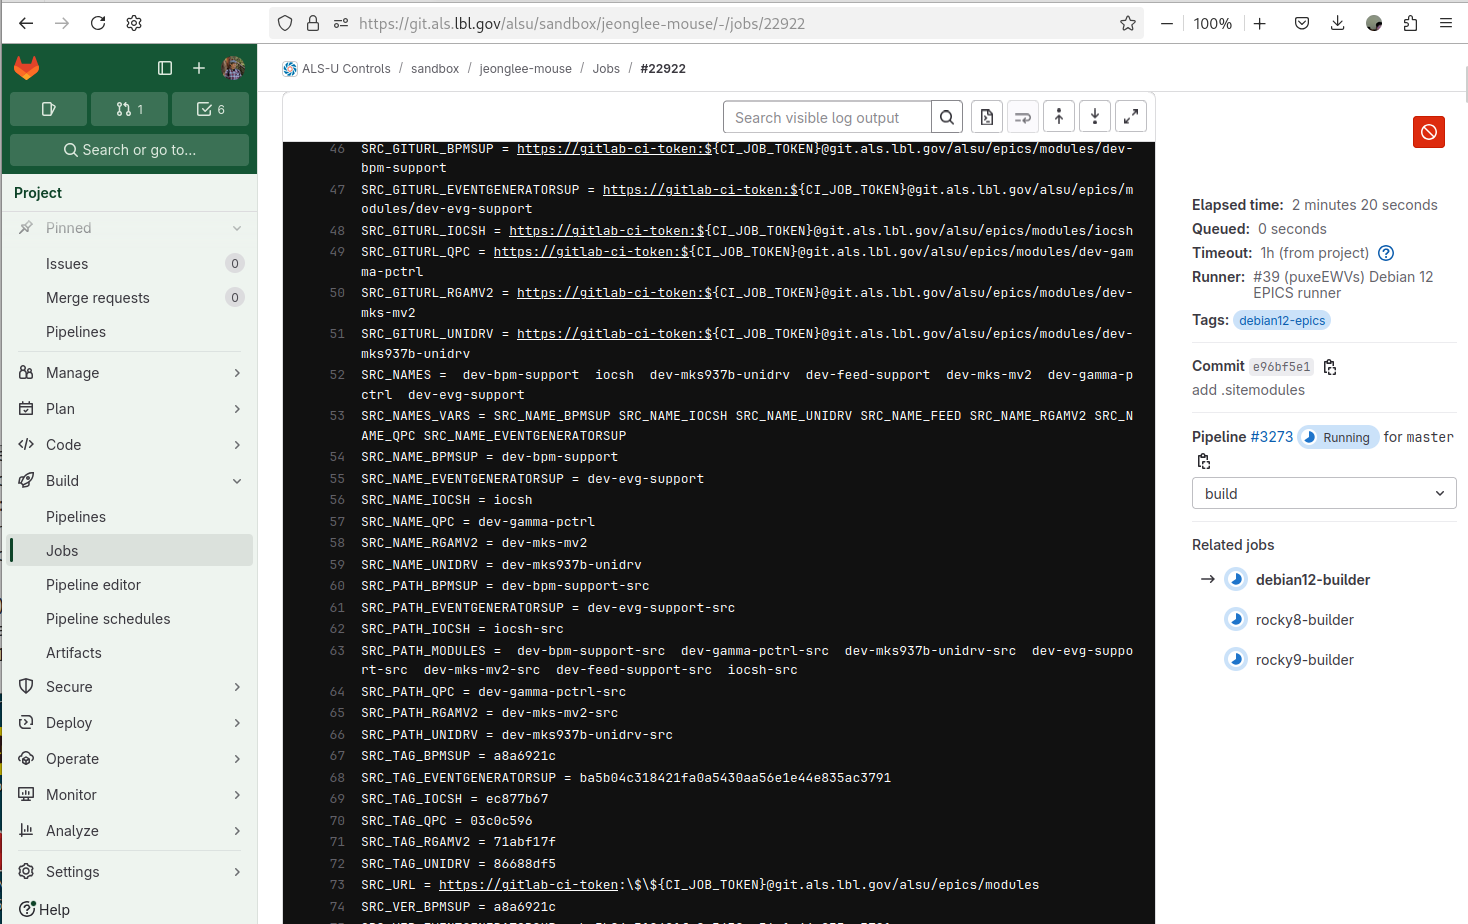 |
|---|
Figure 11 ALS-U GitLab Sandbox - debian12-builder - .sitemodule |